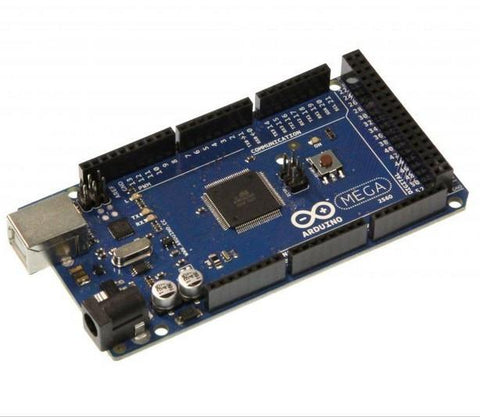
액추에이터를 제어하기 위해 PLC를 프로그래밍하는 것은 수행하기 어려운 프로젝트 중 하나 일 수 있습니다. 시행 착오, 테스트 및 인내심이 필요합니다. 결과는 엄청나게 기능적이고 보람이 될 수 있습니다.

이 코드는 기능을위한 것입니다 일련의 반응 형 액추에이터. 이것은 고객이 제작 한 코드입니다 Nicola Buccoliero, 로마의 Universtà 캠퍼스 바이오-메디코 출신의 24 세의 이탈리아 엔지니어는 Upenn과의 논문 작업을하고 있습니다.
일련의 피드는 Arduino가 취하는 운영의 레거이며, 추가 데이터는 Arduino 장치를 프로그래밍 된대로 전송합니다. 이 코드를 사용하면 직렬 모니터에 숫자를 입력하면 액추에이터가 이동하기를 원하는 Arduino에 알려줍니다.
코드가하는 일은 다음과 같습니다.
-
초기화 (설정) :
- 모터 및 액추에이터 피드백 센서에 대한 연결을 설정합니다.
-
지침은 직렬 모니터보기 :
- Arduino는 당신이 숫자를 입력 할 것을 찾고 있습니다. 직렬 피드에 숫자가 들어가면 모터를 움직이기 시작합니다.
-
모터 이동 :
- 대상 위치가 설정되면 Arduino는 액추에이터를 대상으로 이동하기 시작합니다. 센서가 그 지점에 도달하는시기를 알기 위해 주시를 계속합니다.
-
위치에서 중지 :
- 움직일 때 센서를 계속 확인합니다. 센서가 올바른 지점에 있다고 말하면 시스템이 모터를 중지합니다.
-
다음 지시를 기다리십시오 :
- 시스템은 추가 지시를 기다릴 것입니다. 새로운 메시지가 들리면 같은 과정에 따라 다시 움직이기 시작합니다.
이 코드는 모터를 제어하여 특정 장소로 가서 멈추고 말할 때 다시 할 준비를하도록 도와줍니다.
이 코드는 a로 시작하기위한 것입니다 완전히 철회 된 액추에이터, "0"위치는 완전히 후퇴 된 스트로크 끝입니다. 그러나이 코드는 액추에이터가 확장 중에 초기화되면 작동합니다. 액추에이터를 뒤로 이동하려면 음의 정수 값을 입력해야합니다 (예 : -1200).
니콜라의 코드// Input / Output Pins
const int motorPin1 = 10; // Pin to control the motor forward
const int motorPin2 = 11; // Pin to control the motor backward
const int sensorPin = 3; // Pin to read the sensor
// Variables
int speed = 255; // Adjust to change actuator speed (0-255)
int sensorValue = 0;
int previousSensorValue = 0;
int motorChangeCount = 0;
int lastStoppedCount = 0;
int targetNumber = 0;
bool motorEnabled = false;
bool waitForCommand = true;
void setup() {
pinMode(motorPin1, OUTPUT);
pinMode(motorPin2, OUTPUT);
pinMode(sensorPin, INPUT);
Serial.begin(115200);
}
void loop() {
if (!motorEnabled && Serial.available() > 0) {
targetNumber = Serial.parseInt();
if (targetNumber != 0) {
Serial.print("Target number: ");
Serial.println(targetNumber);
motorEnabled = true;
analogWrite(motorPin1, speed); // Move forward
analogWrite(motorPin2, 0); // Stop
// Set the counter to the stopped value, considering the difference between targetNumber and lastStoppedCount
if (targetNumber > lastStoppedCount) {
motorChangeCount = lastStoppedCount + 1; // Start from +1
} else if (targetNumber < lastStoppedCount) {
motorChangeCount = lastStoppedCount - 1; // Start from -1
} else {
motorChangeCount = lastStoppedCount; // Keep the same value
}
waitForCommand = true; // Wait for a new input from the serial
}
}
if (motorEnabled) {
sensorValue = digitalRead(sensorPin);
if (sensorValue == 1 && previousSensorValue == 0) {
if (motorChangeCount < targetNumber) {
motorChangeCount++;
} else if (motorChangeCount > targetNumber) {
motorChangeCount--;
}
Serial.print("Change from 0 to 1: ");
Serial.print(motorChangeCount);
Serial.print(" - Target number: ");
Serial.println(targetNumber);
}
previousSensorValue = sensorValue;
if (motorChangeCount < targetNumber) {
analogWrite(motorPin1, speed); // Move forward
analogWrite(motorPin2, 0);
} else if (motorChangeCount > targetNumber) {
analogWrite(motorPin1, 0);
analogWrite(motorPin2, speed); // Move backward
} else {
analogWrite(motorPin1, 0); // Stop the motor when the motor count corresponds to the target number
analogWrite(motorPin2, 0);
motorEnabled = false;
Serial.println("Motor stopped. Awaiting a new number.");
lastStoppedCount = motorChangeCount; // Store the value of motorChangeCount when the motor stops
waitForCommand = true; // Wait for new instructions
}
}
}
// Code by Nicola Buccoliero