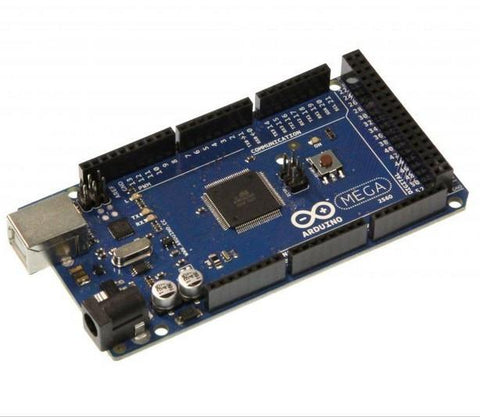
La programmazione di un PLC per controllare l'attuatore può essere uno dei progetti più difficili da intraprendere. Richiede tentativi ed errori, test e un mucchio di pazienza; Sebbene i risultati possano essere incredibilmente funzionali e gratificanti.

Questo codice è per un funzionale Attuatore reattivo seriale. Questo è un codice costruito dal cliente da Nicola Buccoliero, un ingegnere italiano di 24 anni del Campus Bio-Medico di Universtà a Roma, lavorando sulla loro tesi con UPENN.
Il feed seriale è un leger di operazioni che un Arduino prende, con dati aggiuntivi inviati dentro o fuori l'unità Arduino come programmata. Con questo codice, digitando un numero nel monitor seriale dirà al tuo Arduino dove si desidera che il tuo attuatore si muova.
Ecco cosa fa il codice:
-
Inizializzazione (configurazione):
- Imposta le connessioni al motore e al sensore di feedback dell'attuatore.
-
Guardare il monitor seriale per le istruzioni:
- Arduino ti sta cercando per inserire un numero. Quando vede un numero inserito nell'alimentazione seriale, inizia a spostare il motore.
-
Spostando il motore:
- Quando è impostata la posizione target, l'Arduino inizierà a spostare l'attuatore verso il bersaglio. Tiene d'occhio il sensore per sapere quando raggiunge quel punto.
-
Fermarsi nella posizione:
- Mentre si muove, continua a controllare il sensore. Una volta che il sensore dice che è nel punto giusto, il sistema interrompe il motore.
-
Aspetta le prossime istruzioni:
- Il sistema aspetterà ulteriori istruzioni. Quando sente un nuovo messaggio, ricomincia a muoversi, seguendo lo stesso processo.
Questo codice aiuta a controllare un motore per andare in un posto specifico, fermarsi lì ed essere pronto a rifare tutto da capo quando lo è stato detto.
Questo codice ha lo scopo di iniziare con un Attuatore completamente ritirato, che significa che la posizione "0" è l'estremità completamente ritirata della corsa. Tuttavia, questo codice funzionerà se l'attuatore viene inizializzato mentre è esteso: dovrai inserire un valore intero negativo per spostare l'attuatore all'indietro (Ex: -1200)
Il codice di Nicola// Input / Output Pins
const int motorPin1 = 10; // Pin to control the motor forward
const int motorPin2 = 11; // Pin to control the motor backward
const int sensorPin = 3; // Pin to read the sensor
// Variables
int speed = 255; // Adjust to change actuator speed (0-255)
int sensorValue = 0;
int previousSensorValue = 0;
int motorChangeCount = 0;
int lastStoppedCount = 0;
int targetNumber = 0;
bool motorEnabled = false;
bool waitForCommand = true;
void setup() {
pinMode(motorPin1, OUTPUT);
pinMode(motorPin2, OUTPUT);
pinMode(sensorPin, INPUT);
Serial.begin(115200);
}
void loop() {
if (!motorEnabled && Serial.available() > 0) {
targetNumber = Serial.parseInt();
if (targetNumber != 0) {
Serial.print("Target number: ");
Serial.println(targetNumber);
motorEnabled = true;
analogWrite(motorPin1, speed); // Move forward
analogWrite(motorPin2, 0); // Stop
// Set the counter to the stopped value, considering the difference between targetNumber and lastStoppedCount
if (targetNumber > lastStoppedCount) {
motorChangeCount = lastStoppedCount + 1; // Start from +1
} else if (targetNumber < lastStoppedCount) {
motorChangeCount = lastStoppedCount - 1; // Start from -1
} else {
motorChangeCount = lastStoppedCount; // Keep the same value
}
waitForCommand = true; // Wait for a new input from the serial
}
}
if (motorEnabled) {
sensorValue = digitalRead(sensorPin);
if (sensorValue == 1 && previousSensorValue == 0) {
if (motorChangeCount < targetNumber) {
motorChangeCount++;
} else if (motorChangeCount > targetNumber) {
motorChangeCount--;
}
Serial.print("Change from 0 to 1: ");
Serial.print(motorChangeCount);
Serial.print(" - Target number: ");
Serial.println(targetNumber);
}
previousSensorValue = sensorValue;
if (motorChangeCount < targetNumber) {
analogWrite(motorPin1, speed); // Move forward
analogWrite(motorPin2, 0);
} else if (motorChangeCount > targetNumber) {
analogWrite(motorPin1, 0);
analogWrite(motorPin2, speed); // Move backward
} else {
analogWrite(motorPin1, 0); // Stop the motor when the motor count corresponds to the target number
analogWrite(motorPin2, 0);
motorEnabled = false;
Serial.println("Motor stopped. Awaiting a new number.");
lastStoppedCount = motorChangeCount; // Store the value of motorChangeCount when the motor stops
waitForCommand = true; // Wait for new instructions
}
}
}
// Code by Nicola Buccoliero