Introduction
In the realm of linear motion, coordinating multiple actuators can be achieved through various means. While integrated control boards like the FIRGELLI FCB-1 offer a seamless, all-encompassing solution, enthusiasts and engineers seeking a more hands-on approach might opt for a setup involving the Arduino Uno R3. In this post, we’ll walk you through both methods, ensuring you have all the information needed to make an informed decision.
Option 1: Synchronizing Actuators with Arduino Uno R3
Components Required:
- Arduino Uno R3
- High Current Motor Drivers IBT-2 (one for each actuator)
- Bullet Actuators with built-in Hall sensors (or those with optical feedback)
- Rocker Switch
- Stop Button
- 5V Power Supply for Arduino
- 12V DC Power Supply for Actuators
- Arduino Code - Follow this link to get the code for this setup
Wiring and Operation:
-
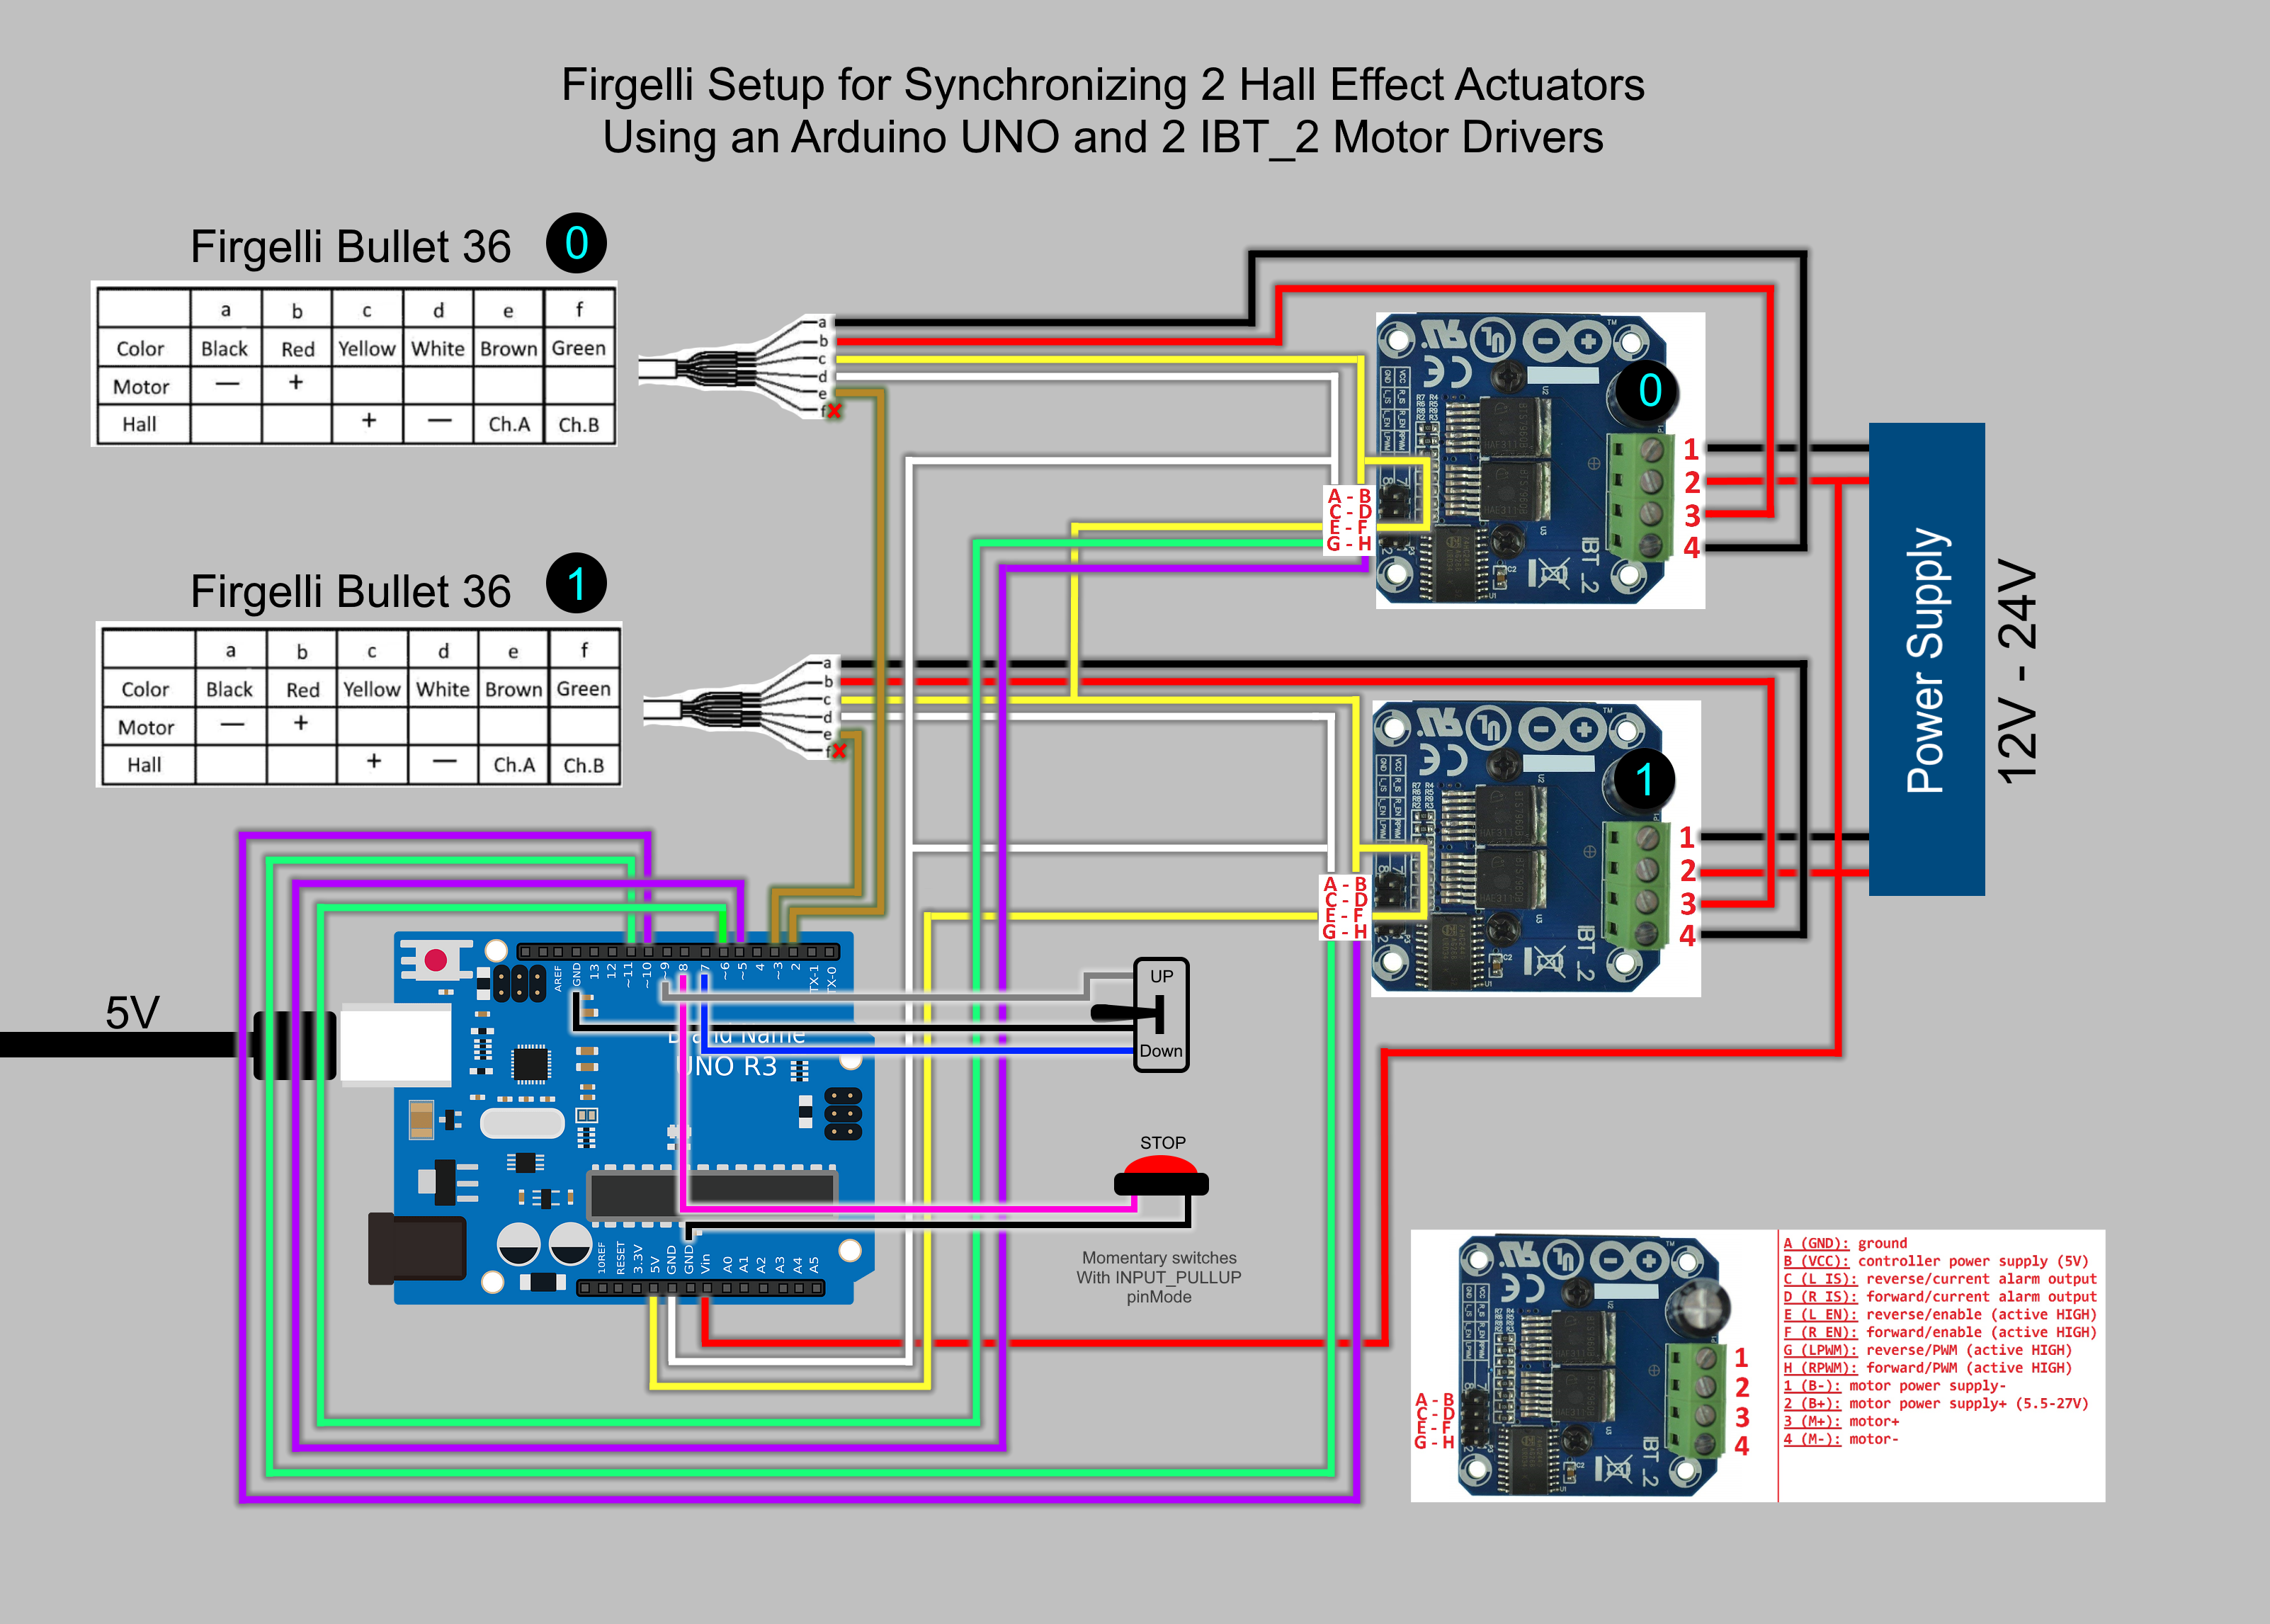
Connecting the Actuators: Connect each Bullet Actuator to a high current motor driver. These drivers are indispensable as the Arduino doesn’t output sufficient current to operate the actuators directly.
-
Integrating Arduino: Wire the Arduino Uno R3 to the motor drivers. Ensure the Arduino is connected to its 5V power supply.
-
Rocker Switch Installation: Incorporate a rocker switch to control the actuators’ upward and downward motion.
-
Emergency Stop Button: As a safety measure, integrate a stop button into the circuit as illustrated in the provided wiring diagram.
-
Functionality: The Arduino counts the pulses from each actuator's Hall sensor, adjusting the speed of the faster actuator to synchronize with the slower one, ensuring uniform motion.
-
Power Supply: Remember to connect the actuators to a 12V DC power supply to ensure optimal performance.
In this instance, Bullet Actuators equipped with built-in Hall sensors are utilized. However, these actuators are versatile, compatible also with optical feedback control systems. This compatibility is made possible because the Arduino emits a consistent 5V signal, irrespective of whether it’s connected to a Hall or optical sensor - the controller simply can’t differentiate between the two.
The working principle is straightforward. The Arduino processes the pulses received from each actuator's Hall sensor. If it identifies a speed disparity between two actuators, it intervenes, reducing the speed of the faster unit to align with the slower one, ensuring synchronized operation.
However, there’s a power limitation to consider. The Arduino, on its own, is incapable of supplying the required current to efficiently drive an actuator, especially those demanding 3-10A power. This is where high current motor drivers come into play. They act as a bridge, amplifying the Arduino’s signals to ensure the actuators receive adequate power for optimal performance. This setup ensures not just synchronized, but also powerful and efficient operation of the actuators.

Option 2: Using FIRGELLI FCB-1 Controller for Easy Synchronization
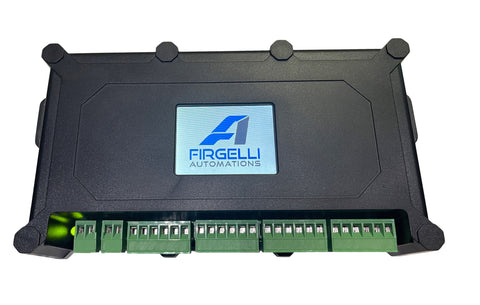
For those seeking simplicity and ease of use, the FIRGELLI FCB-1 Actuator Controller emerges as a premium choice. With user-friendly features and a simplified wiring process, it stands out as a viable alternative.
Features:
- Built-in LED touch screen for easy programming and operation.
- Ability to synchronize up to 4 actuators.
- Requires only one 12V DC power input.
- No complex programming needed.
Steps to Set Up:
-
Connect the Actuators: Directly connect up to 4 actuators to the FIRGELLI FCB-1.
-
Power Supply: Attach the 12V DC power input to power both the controller and connected actuators.
-
Utilize the LED Touch Screen: Use the intuitive interface to program and control the actuators, setting limits, speed, and other parameters effortlessly.
Watch he video below to see the FCB-1 controller in action.
Conclusion
While the Arduino setup offers customization and is a learning curve for enthusiasts, the FIRGELLI FCB-1 Controller promises ease and efficiency, marking itself as a go-to for those prioritizing simplicity and functionality. Evaluate your specific needs, technical prowess, and project requirements to select the option that aligns seamlessly with your objectives. Happy building!
